Instructions
- Read over directions thoroughly, as you’ll want to work very quickly once you start mixing the butter in.
- Scoop butter into approximately tablespoon sized scoops and place in a bowl. Put in the freezer for 20-30 minutes.
- Line a large rimmed baking sheet with parchment paper.
- While butter is in the freezer, in a large bowl whisk together the flours, sugar, baking powder, ginger, salt, clove, and cinnamon. Set aside. In a small bowl, whisk together the molasses, 3 tablespoons milk, yogurt, and vanilla. Set aside.
- Place a few tablespoons of flour in a small bowl and flour your clean work surface with some of it. Get a bench scraper (or butter knife and flat metal spatula) out so you’re ready to go.
- Once butter is chilled, scrape butter into the dry ingredient bowl. Quickly use a pastry cutter (or a large fork) and cut the butter into the dry ingredients until butter pieces are a little larger than pea size and evenly distributed. Mixture will look dry and crumbly. (This should take less than 1 minute. Be sure you are working quickly. Do not use fingers for this process, as vegan butter melts much more quickly than traditional.)
- Pour the wet into the dry and gently mix together with a large fork, until what looks like a shaggy mess (not fully combined) is left in the bowl. Do not mash with the fork. It’s more of a gentle mix-folding.
- For the next steps, work very quickly so the butter doesn’t warm too much. This process should take about 3-5 minutes in total.
- Dump dough onto your floured work surface. There will be lots of dry bits and loose flour that come out of the bowl. Organize into a large heap with your hands and gently press down with your fingertips. Cut in half with your bench scraper and use the scraper to help fold one half over onto the other. Bring the dry bits in with your hands again and gently press down to about 1 1/2 inches thick. Cut in half again, fold over again, press down again. Lightly flour below and on top if any sticking occurs, but also try not to over-flour. Repeat the cut, fold over, and press process 4-5 more times. (This process helps create the light, tender, flaky layers throughout the scones. Each time you cut, fold, and press, the dough will become more dough-like and cohesive. You should see flattened pieces of butter in the dough and it will start to feel like a thick cookie dough.) After your final cut and fold, press into a 6x6 inch square that is about 1-inch thick.
- Using your bench scraper, cut the square in half and then cut in half the other way. You should have 4 squares. Cut each square on the diagonal so you have 8 triangular scones. With your bench scraper carefully move each triangle to the baking sheet leaving equal space between scones. Place scones in the freezer for 15 minutes.
- Preheat your oven to 425° F while the scones chill. Remove scones from the freezer and lightly brush the tops with 1 tablespoon of milk (you won’t use all of it). Place on the center rack in the oven and bake for 14-16 minutes. The scone corners will be a nice golden brown and tops/edges will be lighter.
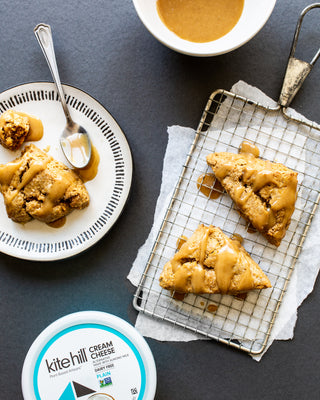
- Let cool for 5 minutes then move to a cooling rack. Cool for another 10 minutes. While cooling, warm cream cheese (for glaze) over low heat in a small sauce pan. Once warmed and soft, remove from heat. Add to a bowl and whisk in remaining glaze ingredients starting with 1 tablespoon of milk. Add more to thin out if desired. Drizzle overtop scones and serve.
- Once fully cooled, store in an airtight container in the fridge for 2-3 days. Let come to room temp before eating.


